Best EVER Homemade Fondant


If you want to know how to make fondant that’s affordable and also tastes good, then this is it. This homemade fondant recipe is soft, elastic, and works great in any weather. No more struggling with fondant and no more elephant skin. Most important, unlike store-bought fondant, it actually tastes delicious.
I accept the commercial fondant is not the most delicious in fact some really taste bad. Though it is the most convenient to use and has a long shelf life.
I started my career as a cake decorator using store-bought sugarpaste that people hated to eat. I noticed that parents were bothered when they saw kids eat it.
So, I tested and tried many homemade sugar paste recipes so I could use them on the kids’ cakes. Some recipes worked great sometimes and at other times it can be a nightmare. But, I didn’t give up and finally managed to make my own homemade sugar paste recipe successfully every single time. Yes, I do believe this is my no-fail fondant recipe!
Why you’ll love this fondant?
- I have spent months perfecting this fondant. It has the perfect texture and is a dream to work with. Even if you are a novice and making your first decorated cake, you will master this like a pro. And, if you are a cake decorator, your clients will enjoy this fondant.
- Also, kids will love to eat it because it tastes like sweet buttercream.
- The best thing about this fondant is that it has good elasticity.
- I don’t like a thick layer of fondant on my cakes. Unlike store-bought fondant, due to good elasticity, you can roll this out really thin.
- The best part is that it has a long shelf life. Leftovers can be put in plastic wrap and in an air-tight container. It will keep on the counter for a month than in the refrigerator for 3 months or in the freezer for up to a year.
- You can use this fondant for cakes, cupcakes as well as cookies. And yes, you can use them for your regular shaped celebration or wedding cakes, or novelty cakes.
- This recipe uses ingredients like corn syrup, glycerin, and gelatin. If you don’t have these ingredients I highly recommend making homemade marshmallow fondant that uses only two ingredients marshmallows and confectioners sugar.

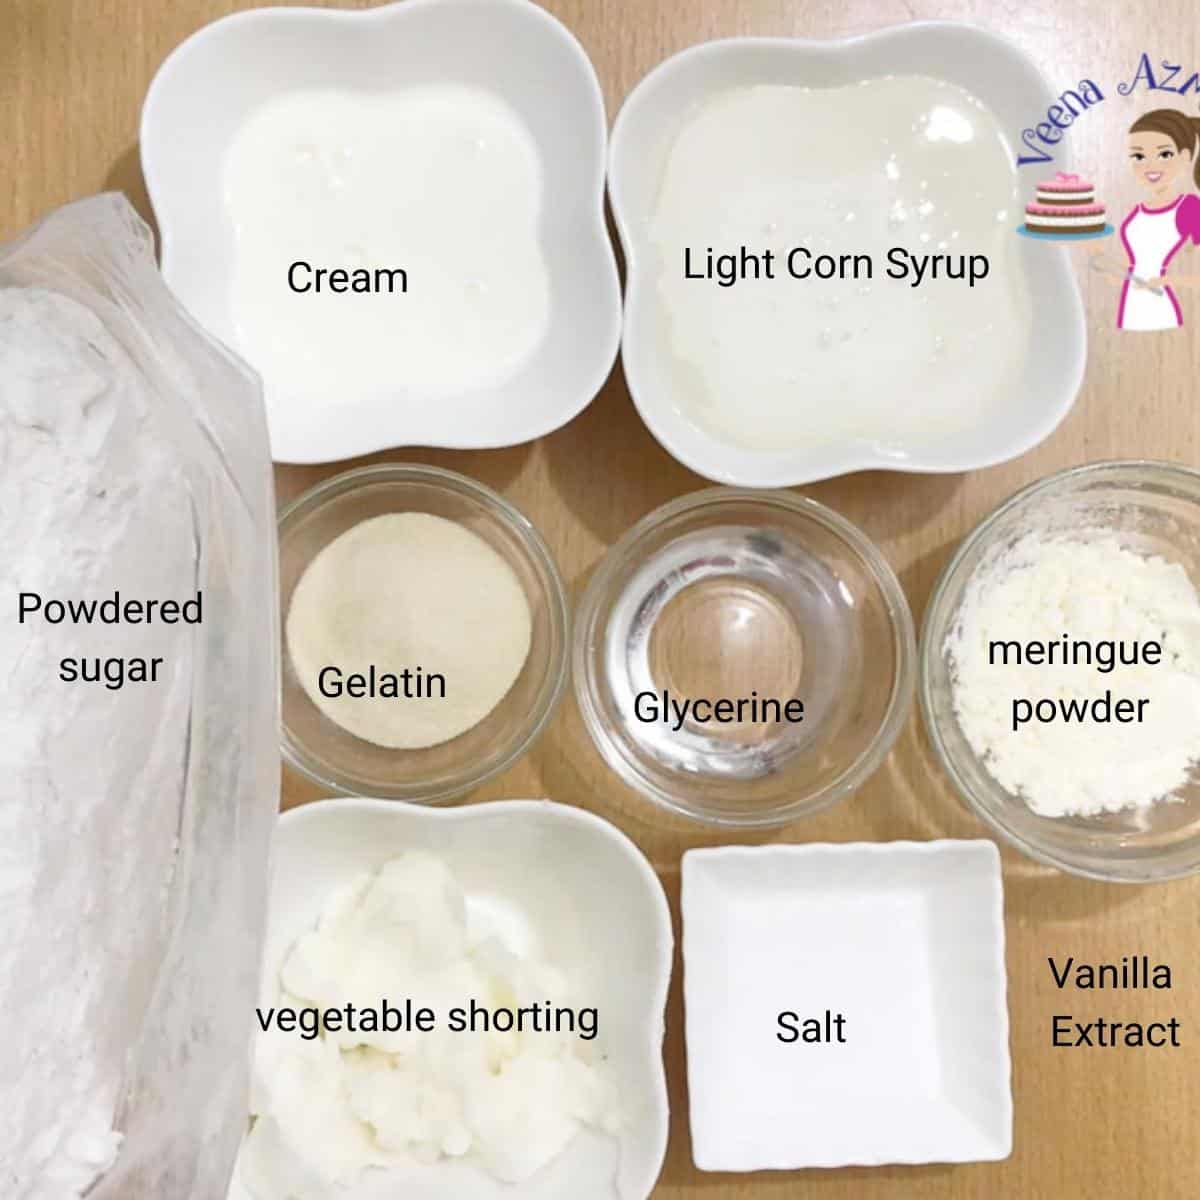
Ingredients and substitutes
- Powdered sugar – Also known as confectioners sugar or icing sugar. You want to use 10x, well-sifted powdered sugar to prevent a lumpy fondant. Ideally, cane sugar will give you a better smoother fondant while fondant made from beet sugar can be grainy.
- Gelatin – This is what gives fondant that elasticity. So, make sure to use a brand that works well. Agar-agar is a vegetarian to make homemade vegetarian fondant recipe.
- Light corn syrup – This is available in most supermarkets these days. And, if not, try liquid glucose, which is usually available in most cake decorating or pastry shops these days. Both glucose and light corn syrup work the same, so use the same quantity.
- Glycerin – Keeps the fondant soft. And, if you can’t find glycerin, you can omit it. You will find that the fondant is a bit tough and needs more kneading.
- Non-dairy creamer – Use non-dairy creamer to extend the fondant’s shelf life. But I love using heavy cream because the fondant tastes better and can be kept out for over a month, thanks to the high sugar content. Also, milk or water can be used instead of cream. However, thinner liquids will use more powdered sugar. Therefore, fondant made with water will need more powdered sugar than fondant made with thick, fresh cream.
Step-by-step: How to make rolled fondant icing
Prepare
- Dry ingredients – Place 600 grams of powdered sugar in the bowl of a stand mixer with the dough hook attachment along with the meringue powder and salt. Stir to combine and set aside.
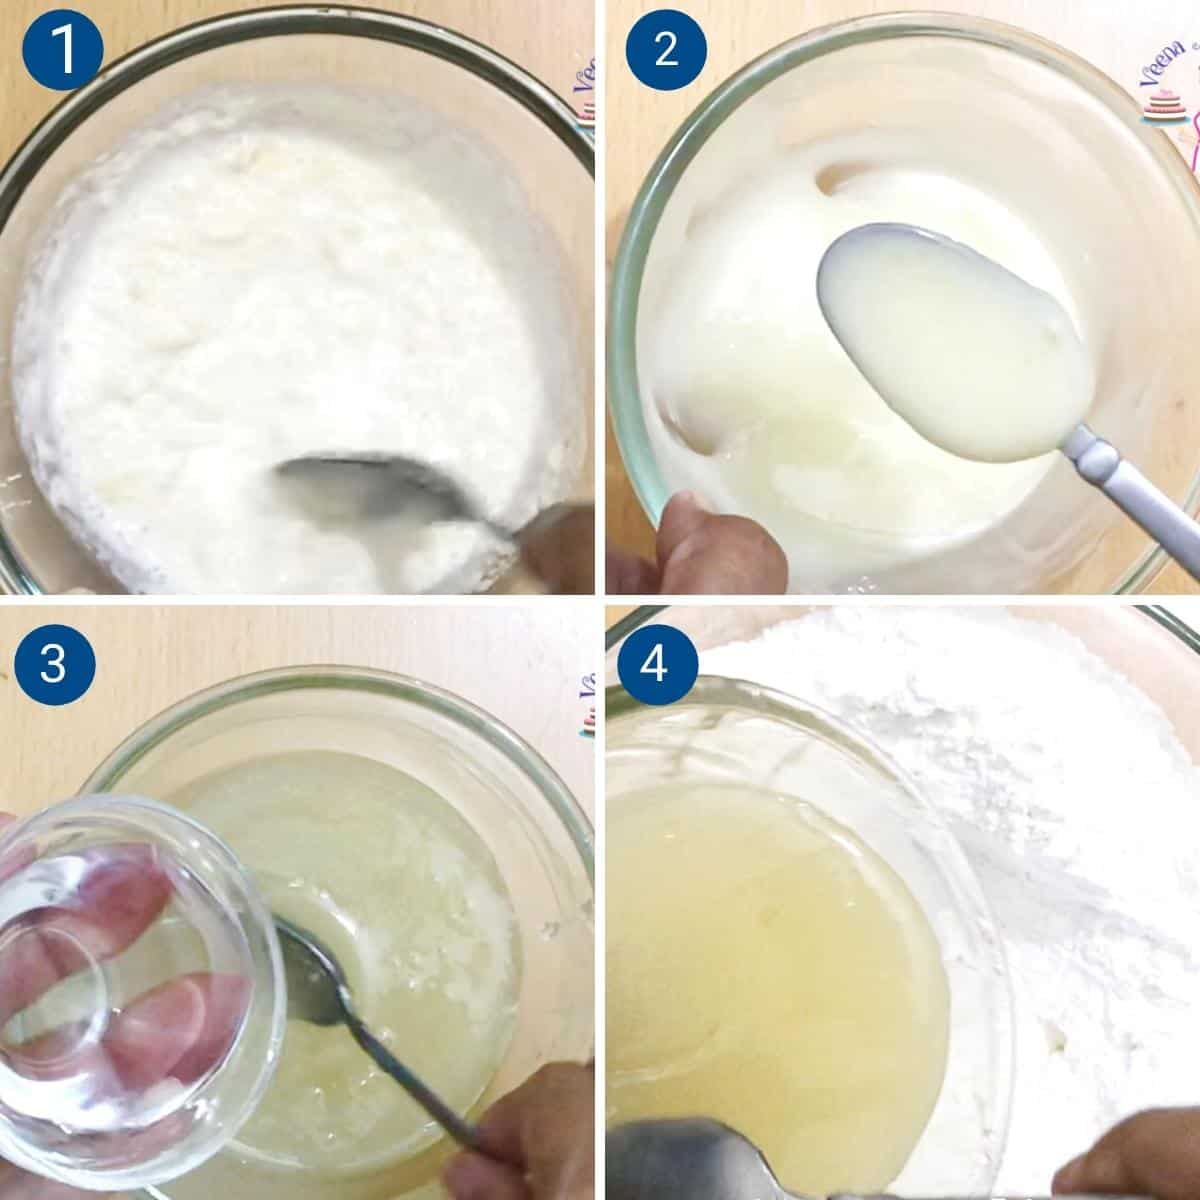
Pro-tip – If you do not have a good stand mixer that can manage a heavy dough such as fondant you can also do this in a large bowl and wooden spoon then, knead by hand. - Wet ingredients – add the whipping cream into a microwave-safe bowl. Sprinkle the gelatin over the cream and let bloom for 2 minutes. You can also do this over a double-boiler
Pro tip – soaking will dissolve the gelatin better otherwise it can be grainy and cloudy. - Dissolve the gelatin in the microwave on high for 30 seconds or more until completely dissolved.
Pro-tip – do not overheat the gelatin as it can lose its gelling ability - Next, add the corn syrup, glycerin, and vanilla extract to the dissolved gelatin and combine well. The mixture must still be barely warm. If the gelatin is already setting, warm it up for 10 seconds more.
Pro tip – depending on the temperature of the ingredients you may or may not need to warm it further. What’s important is that the gelatin is still liquid not setting. - This is your wet ingredients mixture. If you plan to make the full batch with one color you can add your gel food color at this point. Alternatively, you can make the base fondant and then color it in small batches as you need.
Knead
- In the bowl of your stand mixer with the powdered sugar, make a hollow in the center and add in the liquid ingredients. Then, start mixing at medium speed.
Pro tip – And if you are doing this by hand, start mixing from the center out incorporating powdered sugar as you go. - Make sure you get all the powdered sugar mixed well and incorporated before you add any more powdered sugar.
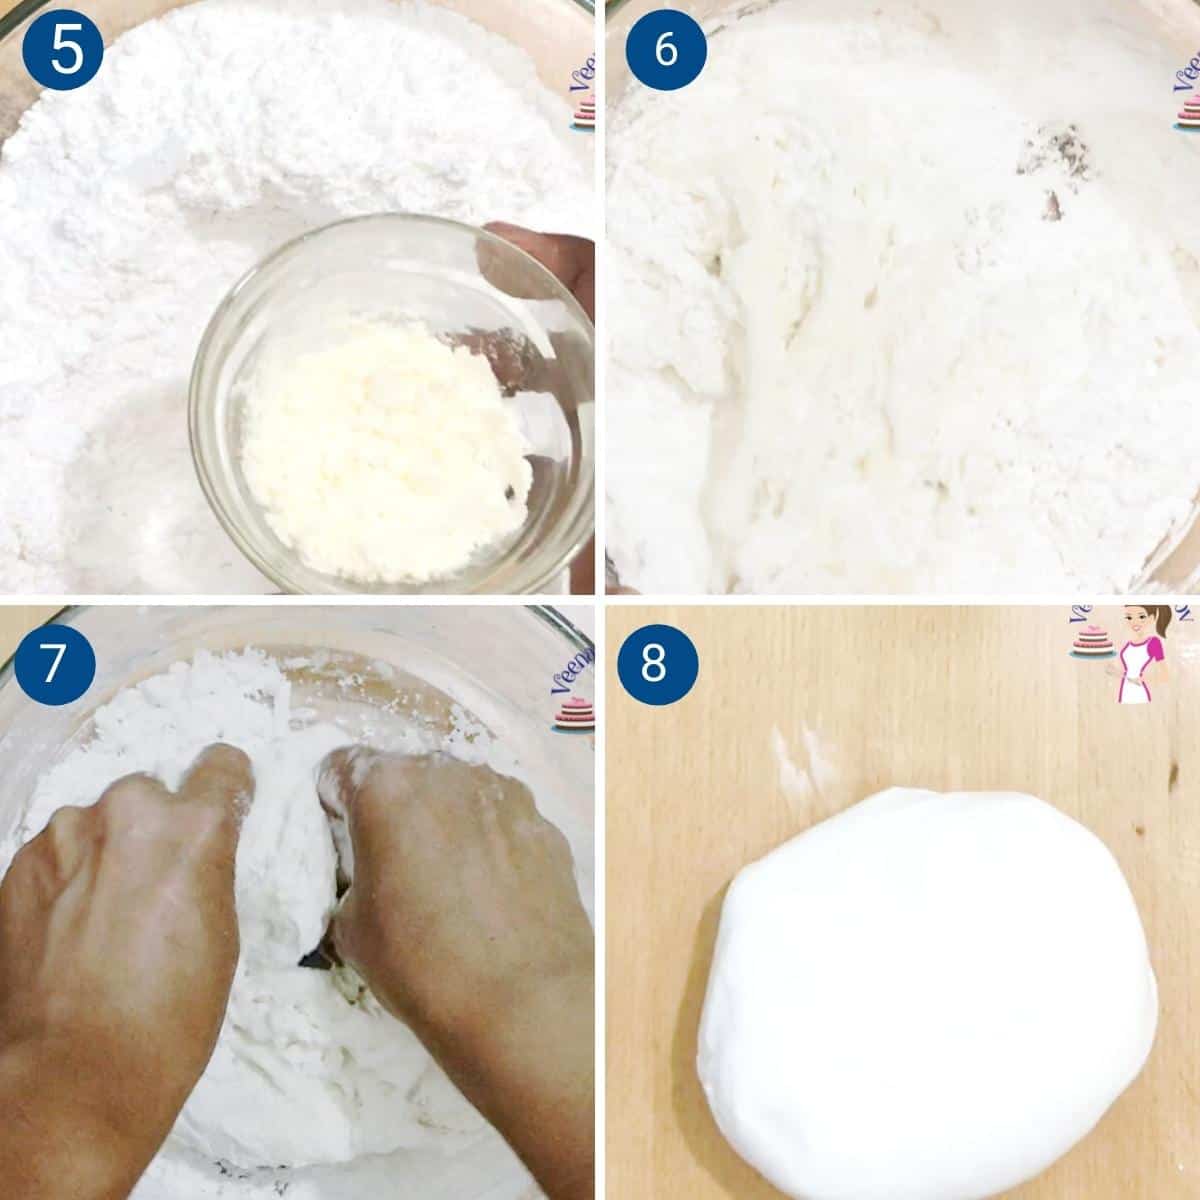
Pro tip – You may not need more powdered sugar, but it’s best to add less now. Also, you can always add more later even before using. - Next, knead in the butter or veg shortening while kneading – this also helps with the stickiness.
Pro tip – The fat combined with the gelatin will make it more elastic. - Once you have a dough formed, transfer to a flat surface or counter lightly dusted with powdered sugar and knead. And if you feel the mixture is dry, grease your hands and counter with butter or vegetable shortening and knead. Alternatively, if the dough is too sticky, add a tablespoon or two of powdered sugar.
Pro tip – If possible, do not add any more powdered sugar at this point as it will stiffen when the gelatin sets. You want the fondant to form a dough but not be too dry. A little sticky is ok too. - Divide into two or four portions and place each in a zip-lock bag. And seal well.
Pro tip – Fondant is sugar, so it dries very easily. And if it forms a crust it will give you are very grainy fondant. So, make sure to always keep it double wrapped with plastic wrap then in a storage bag or plastic and then in an air tight container. - Then, leave in the fridge overnight or at least 4 hours.
Pro tip – It’s important to let the fondant rest because this gives the gelatin time to set and become elastic. Once set, you can store it at room temperature.
How to use homemade fondant?
- Take the fondant out of the fridge and leave it at room temperature. When ready to use, knead it until it is smooth and pliable.
Pro tip – If the fondant icing is hard, you can warm it in the microwave for 10 seconds. However, making it too warm will result in a too soft fondant that is difficult to handle. - It is best to use vegetable shortening to knead the fondant. However, if it is still quite sticky you can add powdered sugar.
Pro tip – The elasticity of your fondant is dependent on the quality of your gelatin and the amount of powdered sugar used. - Lightly dust your counter with mix of powdered sugar and cornstarch and roll the fondant using a rolling pin ( I like to make a pouch using a sock or stockings and fill it with equal amount of corn starch and powdered sugar).
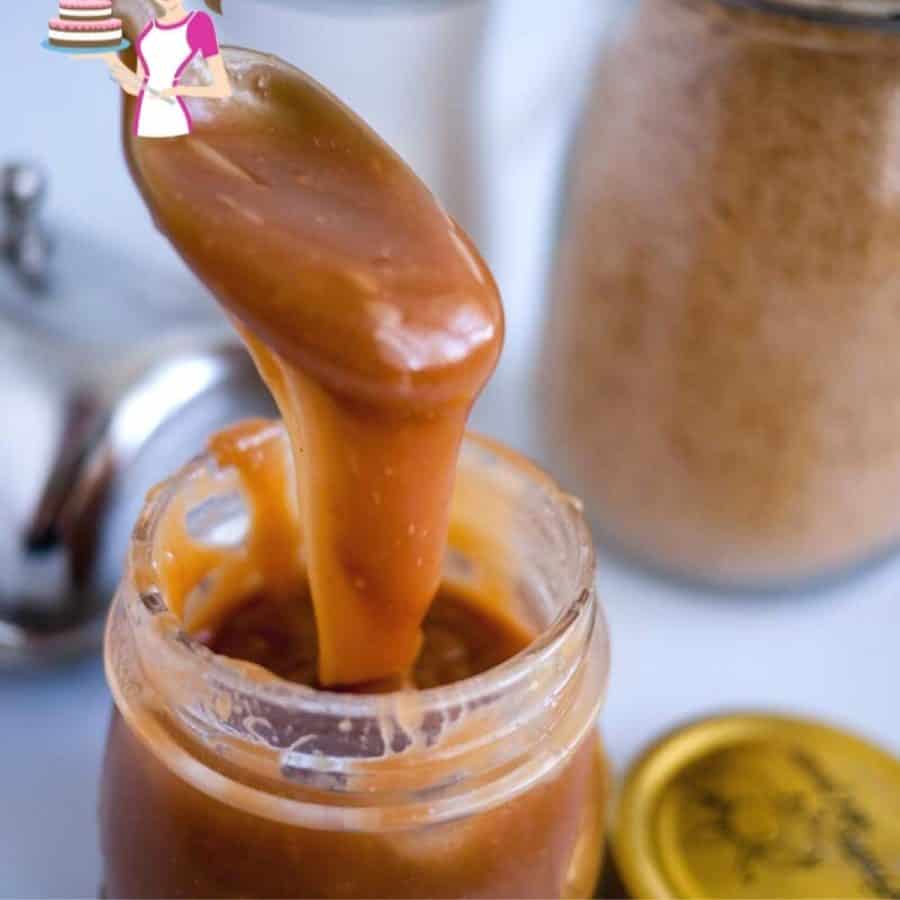
Can you see the elasticity? You should be able to pull it like this – like taffy. Also, read my 14 tips for working with fondant.

How much fondant do I need for my cake?
As a professional cake decorator for over 10 years, this is for novice cake decorators and my students. The chart below is based on 4-inch-tall cakes. For shorter cakes, you will need less, and tall cakes will obviously need more.
Having said that, this presumes rolling fondant to a thickness closer to 1/8″. So, if you roll fondant too thick, closer to 1/4″ thick, you will need more. Adjust accordingly!
| Round | Square | Metric | lbs | OZ |
| 6-inch | 5-inch | 600 g | 1.3 lbs | 18 oz |
| 7-inch | 6-inch | 750 g | 1.6 lbs | 20 oz |
| 8-inch | 7-inch | 900 g | 2 lbs | 24 oz |
| 9-inch | 8-inch | 1 kg | 2.2 lbs | 30 oz |
| 10-inch | 9-inch | 1.2 kg | 2.6 lbs | 36 oz |
| 11-inch | 10-inch | 1.5 kg | 3.4 lbs | 40 oz |
| 12-inch | 11-inch | 1.7 kg | 3.7 lbs | 48 oz |
| 14″inch | 12-inch | 2.5 kg | 5.5 lbs | 72 oz |
| 14-inch | 2.7 kg | 6 lbs | 108 oz | |

How do you color homemade fondant?
I have shared two posts related to fondant. One was 14 must-know tips for working with fondant and the other is How to color fondant. In addition, I’ll also give you a few important tips here. But, if you are new to fondant, you may find those useful.
- First, always use edible food color gels for coloring fondant. Because they will not make your fondant too soft consistency since they are very concentrated in color.
- And, if you don’t have food color gels – you can also use liquid color at the beginning of the recipe while reducing the original quantity of liquid in the recipe.
- Food color gels will intensify over time. So, if you color it ahead of time – make it one shade lighter and keep it for a few days. That way, you won’t have to add more white or use too much color gel.
- Also, color gels can dye your hands. So, it’s best to use gloves when coloring fondant. In addition, rubbing veg shortening on your glove also helps between colors. However, I find that working with gloves is not easy, especially with sticky fondant. So, I work with fondant by just rubbing my hand with vegetable shortening, and then washing them clean with a cream-based detergent.
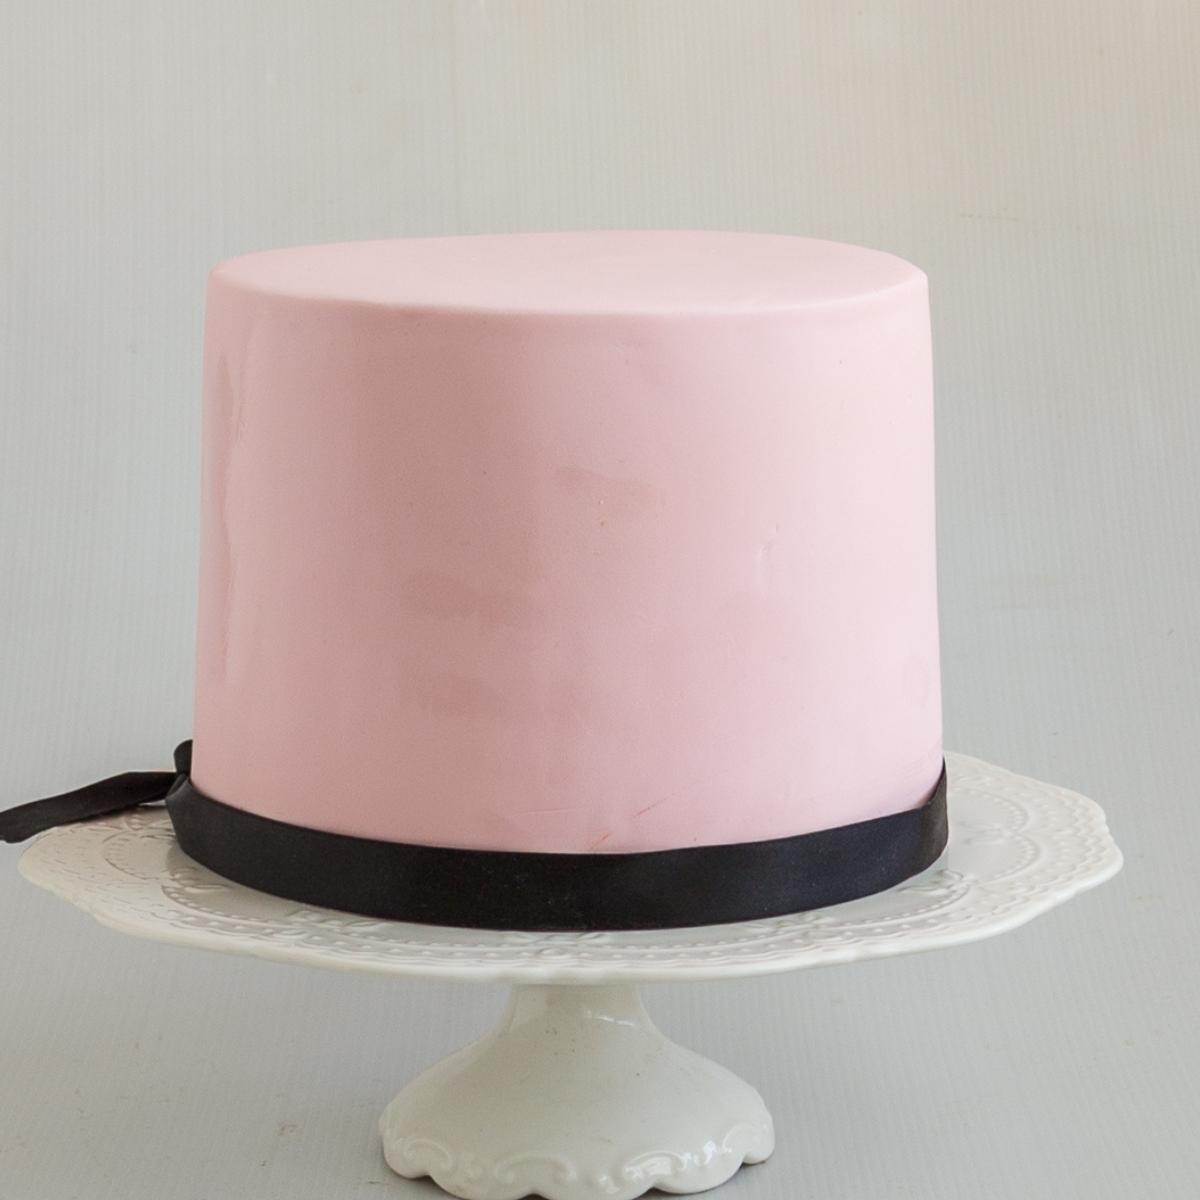
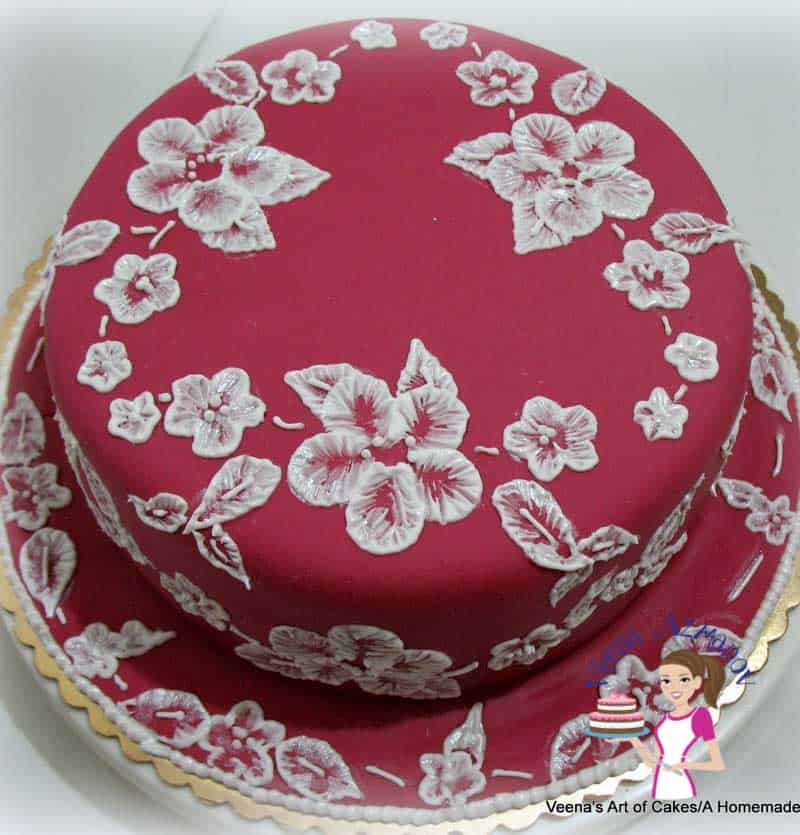
I colored this batch of fondant and used it on this cake. And, I also have a tutorial for this Brush Embroidery on this cake.
Troubleshooting
- Storing fondant – Fondant can be stored in a cool dry place away from heat and sunlight for up to 4 weeks at room temperature. And, you can also keep it for up to six months in the fridge and up to 2 years in the freezer.
However, make sure to always wrap the fondant well in cling wrap first, then place it in a ziplock bag, then in an airtight container to ensure it does not dry out. - Fondant is too hard? Thaw the fondant in the fridge for 10 seconds so you can knead it. Then, add a teaspoon or two of glycerin to help soften it. Next, add vegetable shortening and knead it some more.
And, if this still does not work, it’s best to use this fondant for decorative purposes and decorations. And, make a fresh batch for covering the cake - White fondant – If you need a white fondant, I recommend you use white-colored gelatin (unlike Knox which is almost beige), and veg shortening instead of butter (because veg shortening is white while butter is yellow).
- Dairy-free fondant – Also, if you want to make this parve or non-dairy, use non-dairy liquid creamer and veg shortening instead of butter.


Frequently asked questions
Fondant is high in sugar which works as a natural preservative. Fondant can be stored in a cool dry place away from heat and sunlight for up to 4 weeks at room temperature. And, you can also keep it for up to six months in the fridge and up to 2 years in the freezer. However, make sure to always wrap the fondant well in cling wrap first, then place it in a ziplock bag, then in an airtight container to ensure it does not dry out.
Well, there are many different recipes and variations. The common ingredients in all fondants are powdered sugar or confectioners sugar along with butter or shortening.
This recipe uses light corn syrup, glycerin, and gelatin. A vegetarian version will have agar-agar instead of gelatin. Add cocoa powder to make a chocolate version.
Of course, one of the easiest is to make fondant with marshmallows. You can also make it with chocolate marshmallows.
The shelf life of a cake depends on the cake recipe as well as the fillings and frostings used. In fact, fondant does do a good job of locking in moisture, which automatically extends the life of the cake.
Yes, fondant contains all edible ingredients and is definitely edible. And, it is sweeter than most other frostings.
However, often fondant is used for just decorative purposes. If a cake decorator claims the fondant is not edible, it’s probably because she has used some non-edible ingredients like metallic silver or gold dust.
The fondant needs to be rolled between 1/4 to 18 inches. Too thick will crack the fondant around the edges and too thin will tear the fondant around the edges. Plus no one wants to eat a thick layer of sugar on top of a cake.
A basic chocolate or vanilla cake with buttercream or ganache can be covered in fondant 2 to 3 days ahead and left at room temperature. And, if the cake has any perishable filling or frosting it must be kept in the fridge.
At room temperature! Leave a fondant-covered cake in a cool dry place at room temperature away from open windows or wind. And, if the cake contains perishable frosting, you can also store it in the fridge.
The BEST Homemade Fondant Recipe
If you are looking for the best homemade fondant, sugar paste, recipe that’s affordable and also tastes good, then this is it. This homemade fondant recipe is soft, elastic, and works great in any weather. And most of all, unlike store-bought fondant, this one actually tastes delicious. This recipe is so simple, easy and effortless. It will have you making fondant for all your cakes. And if you are a novice, you will be surprised how easy it is to work with.
Video
Ingredients
- ¼ cup (60 ml) Non-dairy liquid creamer or fresh whipping cream
- 1 ½ tbsp (14 g) Gelatin
- ½ tsp Meringue powder
- ½ cup (120 ml) Light corn syrup or glucose syrup
- 3 tbsp (45 g) Unsalted butter or veg shortening
- 1 ½ tbsp Glycerin
- ½ tsp Salt
- 2 tsp Vanilla extract or other flavorings
- 5 cups (600 g) Powdered sugar
- 1½ cups (180 g) Powdered sugar additional for kneading, as necessary
Method
- Dry ingredients – Place 600 grams of powdered sugar in the bowl of a stand mixer with the dough hook attachment along with the meringue powder and salt. Stir to combine and set aside.Pro-tip – If you do not have a good stand mixer that can manage a heavy dough such as fondant you can also do this in a large bowl and wooden spoon then, knead by hand.½ tsp Meringue powder , ½ tsp Salt , 5 cups Powdered sugar
- Wet ingredients – add the whipping cream into a microwave-safe bowl. Sprinkle the gelatin over the cream and let bloom for 2 minutes. You can also do this over a double-boilerPro tip – soaking will dissolve the gelatin better otherwise it can be grainy and cloudy.¼ cup Non-dairy liquid creamer , 1 ½ tbsp Gelatin
- Dissolve the gelatin in the microwave on high for 30 seconds or more until completely dissolved. Pro-tip – do not overheat the gelatin as it can lose its gelling ability
- Next, add the corn syrup, glycerin, and vanilla extract to the dissolved gelatin and combine well. The mixture must still be barely warm. If the gelatin is already setting, warm it up for 10 seconds more. Pro tip – depending on the temperature of the ingredients you may or may not need to warm it further. What's important is that the gelatin is still liquid not setting.½ cup Light corn syrup , 3 tbsp Unsalted butter , 1 ½ tbsp Glycerin, 2 tsp Vanilla extract
- This is your wet ingredients mixture. If you plan to make the full batch with one color you can add your gel food color at this point. Alternatively, you can make the base fondant and then color it in small batches as you need.
- In the bowl of your stand mixer with the powdered sugar, make a hollow in the center and add in the liquid ingredients. Start mixing at medium speed.Pro tip – if you are doing this by hand start mixing from the center out incorporating powdered sugar as you go.
- Make sure you get all the powdered sugar mixed well and incorporated before you add any more powdered sugar. Pro tip – You may or more not need more powdered sugar but best to add less than more right now. Also, you can always add more later even before using.
- Knead in the butter or veg shortening while kneading – this also helps with the stickiness.Pro tip – the fat combined with the gelatine will make it more elastic.
- Once you have a dough formed, transfer to a flat surface or counter lightly dusted with powdered sugar and knead. If you feel the mixture is dry grease your hands and counter with butter or vegetable shortening and knead. Alternatively, if the dough is too sticky add a tablespoon or two of powdered sugar.Pro tip – If possible do not add any more powdered sugar at this point as it will stiffen when the gelatin sets. You want the fondant to form a dough but not be too dry. A little sticky is ok too.
- Divide into two or four portions and place each in a zip-lock bag. And seal well.Pro tip – fondant is sugar so it dried very easily. If it forms a crust it will give you are very grainy fondant. So, make sure to always keep it double wrapped in a plastic then storage bag or plastic then container.
- Leave in the fridge overnight or at least 4 hours. Pro tip – it is important to let the fondant rest because this gives the gelatine time to set and become elastic. Once set you can store it at room temperature.
- Take the fondant out of the fridge and leave it at room temperature. When ready to use knead it until it is smooth and pliable. Pro tip – if the fondant is hard you can warm it in the microwave for 10 seconds but making it too warm will result in a too soft fondant that is difficult to handle.
- It is best to use vegetable shortening to knead the fondant. However, if it is still quite sticky you can add powdered sugar. Pro tip – the elasticity of your fondant is dependent on the quality of your gelatin and the amount of powdered sugar used.
Notes
- Storing fondant – Fondant can be stored in a cool dry place away from heat and sunlight for up to 4 weeks at room temperature. And, you can also keep it for up to six months in the fridge and up to 2 years in the freezer.
However, make sure to always wrap the fondant well in cling wrap first, then place it in a ziplock bag, then in an airtight container to ensure it does not dry out. - Fondant is too hard? Thaw the fondant in the fridge for 10 seconds so you can knead it. Then, add a teaspoon or two of glycerin to help soften it. Next, add vegetable shortening and knead it some more.
And, if this still does not work, it’s best to use this fondant for decorative purposes and decorations. And, make a fresh batch for covering the cake - White fondant – If you need a white fondant, I recommend you use white-colored gelatin (unlike Knox which is almost beige), and veg shortening instead of butter (because veg shortening is white while butter is yellow).
- Dairy-free fondant – Also, if you want to make this parve or non-dairy, use non-dairy liquid creamer and veg shortening instead of butter.
Fondant covered cakes
- How far in advance can you cover a fondant cake? A basic chocolate or vanilla cake with buttercream or ganache can be covered in fondant 2 to 3 days ahead and left at room temperature. And, if the cake has any perishable filling or frosting it must be kept in the fridge.
- How to store fondant cakes? – At room temperature! Leave a fondant-covered cake in a cool dry place at room temperature away from open windows or wind. And, if the cake contains perishable frosting, you can also store it in the fridge.
- How long do fondant cakes keep? The shelf life of a cake depends on the cake recipe as well as the fillings and frostings used. In fact, fondant does do a good job of locking in moisture, which automatically extends the life of the cake.
Equipment you will need


Nutrition
Tried this recipe?
Mention @veenaazmanov_kitchen or tag #veenaazmanovkitchen!


Hi wondering if I can use oat milk as opposed to the dairy free creamer…Thanks
Hey Shirley – I would prefer you use water instead, because I know water works. Not sure about oat milk – you can try though.
Hi! I was just wondering what the yield of one batch of this recipe is, I’ve been looking for a while and can’t find it.
Ethan, the recipe card shows that it makes 700 grams – thanks
My friends and family love when I make your desserts!!
All recipes are excellent !!
Thank you so much Liz
Hi Veena, thanks for the recipe. what can I substitute meringue powder with? thanks
You can omit the meringue powder Vicky, there is no other substitute. Thanks